


How To Add, Modify, Rename, or Delete User Accounts In Windows 8
As usual, Microsoft Windows 8 operating system also supports multiple user accounts creation, which can be assigned as either administrator or standard user account type, in addition to a guest account. Setting up separate accounts on a PC will help to keep documents like pictures and assignments organized.
For new Windows 8, it provides a few new ways to customize user accounts from, such as Metro Application or Metro UI which enable users to add, modify, rename, or delete the user Account. However, administrator rights are needed when performing the action to add, modify, or delete the user account completely from the system.
Here’s the step-by-step guide how to add, modify, rename, or delete user account in Windows 8:
Method 1
- First, you must login as Administrator.
- Move the cursor to the right bottom to open Charms bar and select the search box, and then type the Control Panel to open it.
- In that control panel, you can see many options such as System and Security, Programs, Ease of Access, User Account and Family Safety and others.
- Select User Accounts and Family Safety option, and click User Accounts.
- In User Accounts window, you can choose the option you want. You can select the user account to add, modify, rename, or delete.
- To rename the User Account, click on the Change your account name option.
- A new window will appear which need you to type the new account name. Once put the name that want, click on the Change Name button. The User name will be changed instantly.
Method 2
- If you’re an administrator and want to add a user, you also can perform to add or modify user account from the Start Screen.
- Swipe in from the right or move your mouse to top right or bottom right corner to bring out the Charms bar, then select Settings.
- In Settings window, choose the Change PC Settings option, then Users, follow by Add a User.
- From there, you just need to enter the appropriate information and follow the on-screen directions.
In addition, you also can delete the User Accounts in Windows 8 operating system by using Registry Editor.
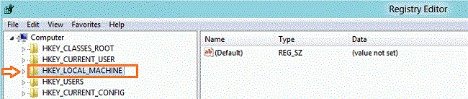
- You can type Regedit into the search box and click on the result. The Registry Editor will be opened.
- In the Registry Editor, there will show many entries.

- Choose HKEY_LOCAL_MACHINE -> Software -> Microsoft -> Windows NT -> Current Version -> Profile List -> S-1-5-21-1582252562-3567101682-4055816014-1001.
- Once in profile list, look into each and every key to identify the user account which you want to delete. Check on ProfileImagePath to determine the user account name of the profile. When you locate the correct profile, right-click on the key and select Delete.

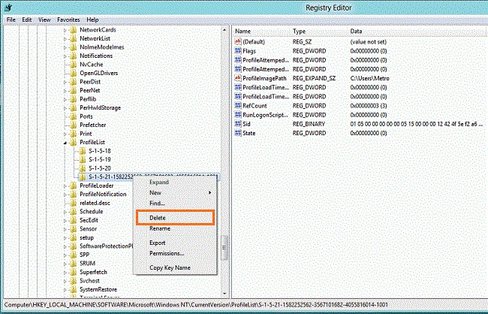
- A dialog box will be shown and asks you for confirmation to delete this account, click the Yes to complete delete the user accounts.


Recent Articles
- How To Download HBO Shows On iPhone, iPad Through Apple TV App
- Windows 10 Insider Preview Build 19025 (20H1) for PC Official Available for Insiders in Fast Ring – Here’s What’s News, Fixes, and Enhancement Changelog
- Kaspersky Total Security 2020 Free Download With License Serial Key
- Steganos Privacy Suite 19 Free Download With Genuine License Key
- Zemana AntiMalware Premium Free Download For Limited Time