


How To Change The Entire System Language in Windows 10 PC
Microsoft Windows operating system comes with more than one display language in PC, in latest Windows 10, the system set with default language which languages are been used to display text in wizards, dialog boxes, menus, Help and Support topics, and other objects in the user interface (UI). Other than default language, Windows 10 also allow to settings the language for single accounts through the Settings app.
However, some PC available with more than single account especially computer owned by corporate, and it’s require computer systems matches with the local languages due to business span across many countries in the world. In addition, Windows users may purchase a new computer that ships from another country with a different language that need to change computer preferences to match with the local settings.

Here how Windows 10 users can change and switch the default language on entire computer such as all accounts, Lock Screen, folder, and system.
To change default language in Windows 10:
- First, press the Windows key + I keyboard shortcut to launch the Settings app.
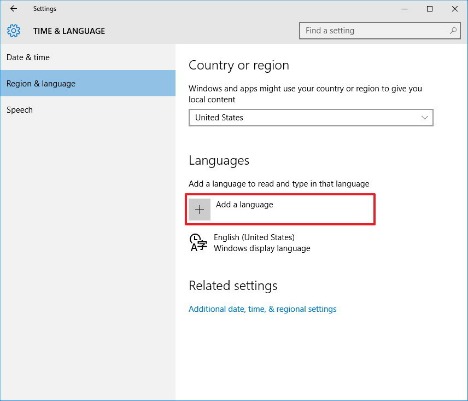
- Next, click on Time & language and then choose Region & language by clicking it.
- Under the Languages option, you should notice “Add a language” options. Click on it and choose the language that user prefer to add, and select the specific variation if applicable.
- Once add the language, select the new language that added, and click Options and download any language packs that necessary.
- Next, click Set as default and select your location under Country or region to enable operating system provide your local content.

- After done, click Windows key + X keyboard shortcut to launch the Power User menu and select Control Panel.
- Control Panel > Clock, Language, and Region > Language.
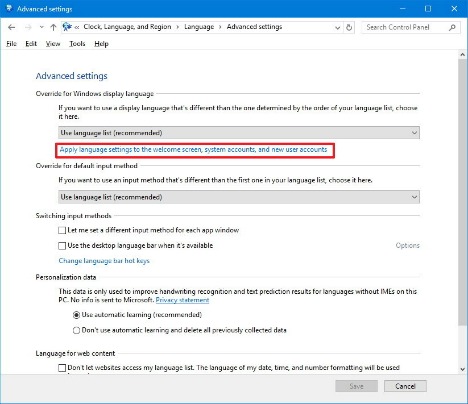
- Then select on the Advanced settings in the left pane.
- Click the “Apply language settings to the Welcome screen, system accounts, and new user accounts” in blue colour word.
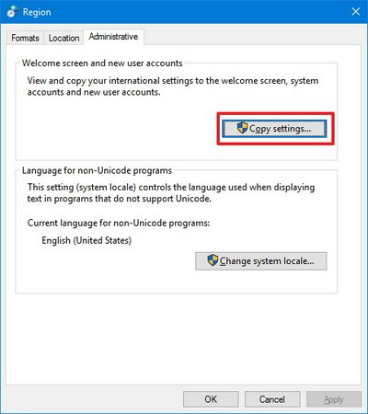
- Screen will forward to next page where you can see the Administrative tab under Region.
- On the “Welcome screen and new user accounts”, click the “Copy settings” button.
- Tick on the Welcome screen and system accounts, and New user accounts options and then click OK button to complete settings.
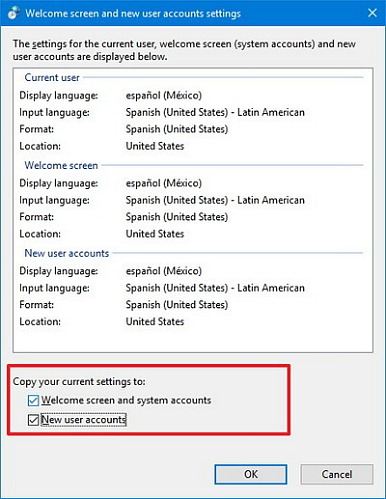
- Reboot or Restart PC, upon reboot you should see the new add language set on entire operating system.
Note: if user login with a Microsoft Account, this trick will sync across all devices. If user only want to change settings on single particular computer, just go to Settings > Accounts > Sync your settings and turn off the Language preferences option.
You can share or follow us on Twitter, add us to your circle on Google+ or like our Facebook page to keep yourself updated on all the latest info from Microsoft, Google, Apple and the Web.


Recent Articles
- How To Download HBO Shows On iPhone, iPad Through Apple TV App
- Windows 10 Insider Preview Build 19025 (20H1) for PC Official Available for Insiders in Fast Ring – Here’s What’s News, Fixes, and Enhancement Changelog
- Kaspersky Total Security 2020 Free Download With License Serial Key
- Steganos Privacy Suite 19 Free Download With Genuine License Key
- Zemana AntiMalware Premium Free Download For Limited Time